Saturday, February 6, 2010

Spider Bracelet Tutorial Part 3!!!!!

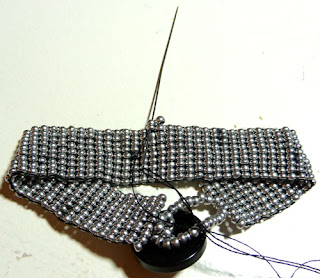
This is a long one!  So get ready!  This is what your bracelet will look like when we're done this Part 3!
Step 1. Attach a new thread in the middle of the bracelet.  Secure it by sewing downward by 3 beads.
Step 2. Sew upward adjacent 3 beads and add 2 new beads.
Step 3. Sew downward 1 adjacent bead from where your thread exited.
Step 4. Sew back up 2 adjacent beads!
Step 5. Add 2 beads and sew downward 2 beads! 
Step 6. Then up 3 beads! Measure the length between your middle finger and your wrist.  Add 1 inch.  That is the total length of the chain from wrist to ring!  Continue beading this way for about half the measured length, then do 2 rows of black beads.
Step 7. Increase to the right side, with a black bead.  Secure it by threading through again!
Step 8. Sew through to left side.
Step 9. Increase by adding another bead!  Secure 1 more time by sewing through again!
Step 10. Add 2 beads and sew in second from left!  Sew up last bead of first increase row and first new bead adjacent bead.
Step 11. Add 1 bead and increase again!  Secure once.  Sew through so that thread comes out top of last bead of new row!

Step 12. Add 1 bead.  Secure it in place by sewing downward into adjacent bead on new row!  Sew back up newly added bead!  Repeat to end of row!  Continue for 6 rows of 6 beads.  Beginning each new row with 2 beads and adding 1 bead at a time!
Step 13. Now it's time to decrease!  Skip 1 bead on one side and add 2 beads.  Sewn down and up, then add 1 bead. Secure it and repeat 1 bead add once more!  For a total of 4 beads.
Step 14. Come up and out of 1 of the middle beads. Sew 1 more row of 2 black beads then switch back to silver.  Continue sewing 2 wide until piece reaches desired length!  Add 4 beads.
Step 15. Sew through the first and second beads.
Step 16. Sew in third bead as well.
Step 17. Add 2 beads and sew downward 2 beads.
Step 18. Sew up 3 beads.  Keep increasing by 2's until the ring reaches desired length.  HINT: make sure ring slips over your knuckle!!
Step 19. Now create a circle by attaching the ends together.  Sew through 3 anchor beads.  Make sure not to twist ring!  Make sure your beads are aligned!
Step 20. Sew in adjacent column 6 beads! Repeat securing! 
Step 21. Now Secure the ring to chain!  Poke out needle above chain.  Sew down in chain at least 2 rows!
Step 22. Sew back up the 2 adjacent beads in chain and 2 parallel beads of ring!  Repeat to secure!  And tie in loose end!  And we're done!!

Wednesday, February 3, 2010

Spider Bracelet Tutorial Part 2!!!!!

So we have our bracelet the length of our wrist!  Now it's time to add the button and loop closure!  We'll start with the Button side!
Step 1. Insert needle into the the first 5 beads of previous row.  Pull thread through!
Step 2. Insert needle into the fifth bead of the last row worked.  Make sure that your thread lies flat between the two rows!
Step 3. Add 3 beads, a button, and 3 more beads (you can increase or decrease number of beads to comfortably fill the gap between button holes!)
Step 4. Thread needle through parallel button hole.  Add 3 beads.
Step 5. Insert needle into the fifth bead of the bracelet base.  Make sure you insert your needle toward the tail thread.  Like so:
Step 6. Pull snugly.  Continue threading needle through the first 3 beads and through to an empty button hole.
Step 7. Add 3 beads and thread needle though the last empty hole!
Step 8. Sew down the 3 anchor beads, through the center (fifth bead of base), and back up through the adjacent three beads to the top of the button!
Step 9. Sew through the 3 beads and add a bead.  Sew through the next 3 beads.  Making a half circle.
Step 10. Add 1 bead and complete the circle.  Reinforce the threads by sewing through all these new beads and anchor base beads!  Repeat several times and sew in tail.
Step 11. Insert needle into 6 beads of previous row.  Pull snugly.
Step 12. Insert needle downward into the 3 middle beads of the last row.
Step 13. Add enough beads to comfortably loop around button.  Sew needle downward through the 3 middle beads again.  Pull snugly.  HINT: Don't make loop too large, because it might slip off the button while you're wearing it! 
Step 14. Reinforce threads by sewing through bead loop and anchor beads a few more times!  Sew in tail!  Congrats!  You have made a bracelet!!

Tuesday, February 2, 2010

Spider Bracelet Tutorial Part 1!!!!!

This is what we're making!! YAY!!  I designed this back in 2004!  Now I'm sharing it with you!  You will need: beading needle, thread (I use an all purpose thread, or you can use a nylon bead thread) seed beads two colors: Black and Silver or Clear (no particular size needed; just don't use super small ones!) button, clear tape, scissors.
Step 1. Thread needle with a 4ft length.  Wrap tape around thread leaving a 12 inch tail.  Thread on 11 beads.
Step 2. Insert needle into the eighth and ninth beads counting  from the right!  Like so:
Step 3. Pull gently but snugly!
Step 4. Insert needle into the two beads from left to right on the new row!
 
Step 5. Add a bead and insert needle in the seventh and eighth beads on the bottom row.  Like so. 
 Step 6. Pull gently but snugly.  Insert needle into the second and first beads.  Like so.
Step 7. Repeat steps 5 and 6 until you finish the second row!
Step 8. Add 2 beads.
Step 9. Insert needle in the fourth and third bead counting from the right.  Like this:
Step 10. Insert needle in the first 2 beads of the third row!
Step 11.  Continue building rows until piece measures the length of your wrist!  Sew in tails as your thread runs out, and add new threads as needed!