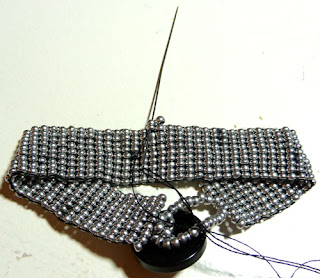
Step 1. Attach a new thread in the middle of the bracelet. Secure it by sewing downward by 3 beads.
Step 2. Sew upward adjacent 3 beads and add 2 new beads.
Step 3. Sew downward 1 adjacent bead from where your thread exited.
Step 4. Sew back up 2 adjacent beads!
Step 5. Add 2 beads and sew downward 2 beads!
Step 6. Then up 3 beads! Measure the length between your middle finger and your wrist. Add 1 inch. That is the total length of the chain from wrist to ring! Continue beading this way for about half the measured length, then do 2 rows of black beads.
Step 7. Increase to the right side, with a black bead. Secure it by threading through again!
Step 8. Sew through to left side.
Step 9. Increase by adding another bead! Secure 1 more time by sewing through again!
Step 10. Add 2 beads and sew in second from left! Sew up last bead of first increase row and first new bead adjacent bead.
Step 11. Add 1 bead and increase again! Secure once. Sew through so that thread comes out top of last bead of new row!
Step 13. Now it's time to decrease! Skip 1 bead on one side and add 2 beads. Sewn down and up, then add 1 bead. Secure it and repeat 1 bead add once more! For a total of 4 beads.
Step 14. Come up and out of 1 of the middle beads. Sew 1 more row of 2 black beads then switch back to silver. Continue sewing 2 wide until piece reaches desired length! Add 4 beads.
Step 15. Sew through the first and second beads.
Step 16. Sew in third bead as well.
Step 17. Add 2 beads and sew downward 2 beads.
Step 18. Sew up 3 beads. Keep increasing by 2's until the ring reaches desired length. HINT: make sure ring slips over your knuckle!!
Step 19. Now create a circle by attaching the ends together. Sew through 3 anchor beads. Make sure not to twist ring! Make sure your beads are aligned!
Step 20. Sew in adjacent column 6 beads! Repeat securing!
Step 21. Now Secure the ring to chain! Poke out needle above chain. Sew down in chain at least 2 rows!
Step 22. Sew back up the 2 adjacent beads in chain and 2 parallel beads of ring! Repeat to secure! And tie in loose end! And we're done!!


No comments:
Post a Comment